One way to install


Standard member
who needs one click!
I have seen several posts on the forum, some asking when composr will become part of the one click install type things.I myself am about as noob as it gets with software, so i thought i would show how i installed composr, i also hope it encourages other to go ahead and try it. The screen shots are of the actual install, as you will see its as easy as it gets.
First of all let me say, i have tried this on two different shared hosting providers, i have done installs both with ftp and without ftp.
The following one is done Using Cpanel and no FTP program. Of course this assumes you have Cpanel or equivilent in your hosting package.
So lets get started….
First log into Cpanel
(i have not shown the far left of cpanel for my own security)
What you are looking for is the section that deals with databases, this is so we can make a database. On my hosts there are two ways to do it, ine is easy and the other is very very easy. So first lets do the very very easy way.
Look for the datbase wizard as shown in this screen shot

Click on the the wizard button.
It should bring up a screen like the following.


Note that your hosting provider may put some characters in front of the name you typed. In the screen shot, you can seen the red border i drew showing this, Its important to realise that this is the actual database name your about to make. So in my case, as you can see in the screen shot my database will actually be called fishlywe_comp1 it is important to write YOUR FULL database name down, you will need this FULL name a little later.
Having pressed next step you should get a screen similar to the following.
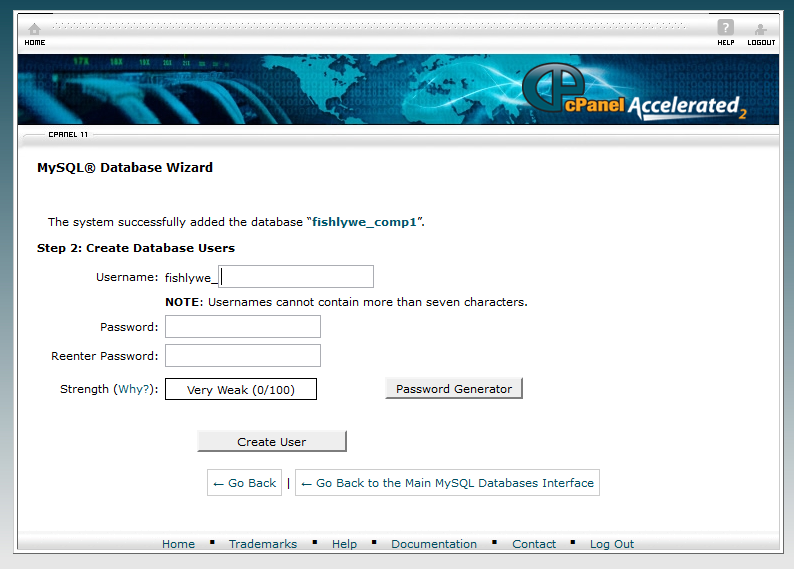
you need to input a name for the database user, this has to be less than 7 characters. Before we do this a few words on database user names…
This is purely the username for the database, it has nothing to do with any kind of login name for your site etc, as far as i am aware it is soley used by the software to write tables and data. A couple of security tips, i am sure there are others but these are the ones i am aware of.
DO NOT use names like the following
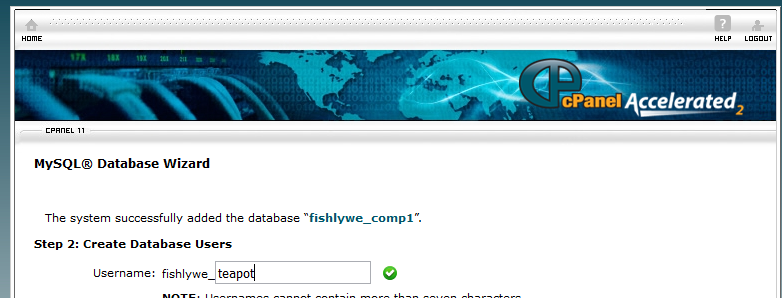
GOD ADMIN COMPOSR YOURNAME Your normal user name!! choose something a bit random, so in my case teapot
The next step is simply fill out the password In my case i used 1XCT67?? Dont use your normal or simple password, write it down as again you will need it shortly, dont use mine!! dont tell anyone yours!
Once you have done this, Click on create user. You will then be taken to a screen looking something like this (dont worry we are nearly done with the database).

You should get a screen like the following.

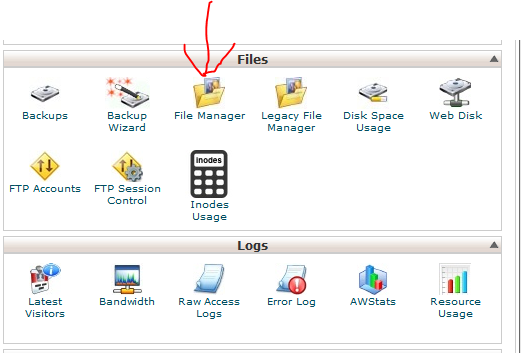
In the main Cpanel window click on the file manager button (arrowed)
I will continue part 2 tomorrow and show you the actual install.

Guest user
Standard member
kmw (Guest) said
great! I look forward to the next steps. would it be the same thing for postgresql?
From “Post #1,293”, 11th December 2016, 5:06 am
I havnt tried! But i guess there is one way to find out
 . I wll give it a go when i get a chance.
Standard member
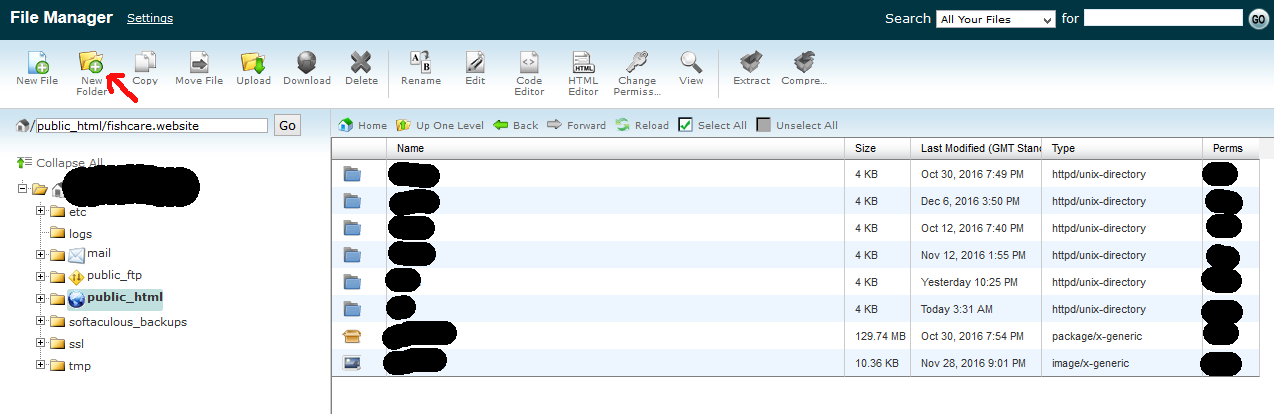
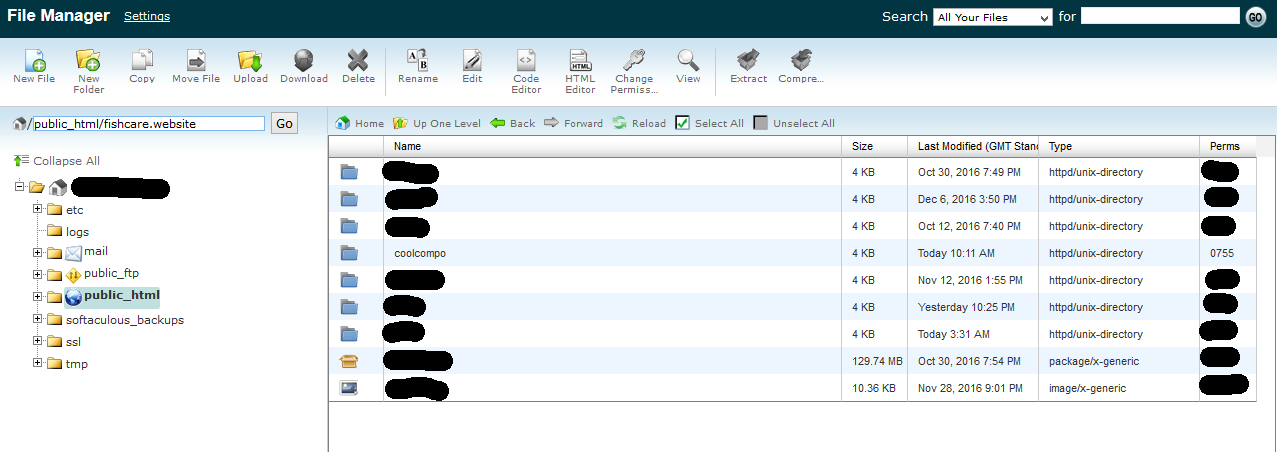
So now we are in the file manager, your screen should look something like this in the file manager window that pops up.
(Note for security i have blacked out some of my information).
Then the address to the install will become www.teapots.com/coolcompo/
So lets add a folder, in my case i will use coolcompo (you are likely to call yours something like site,or cms)
When you click the new folder icon, a little box pops up and as you can see you put the name of the folder in, as shown here.

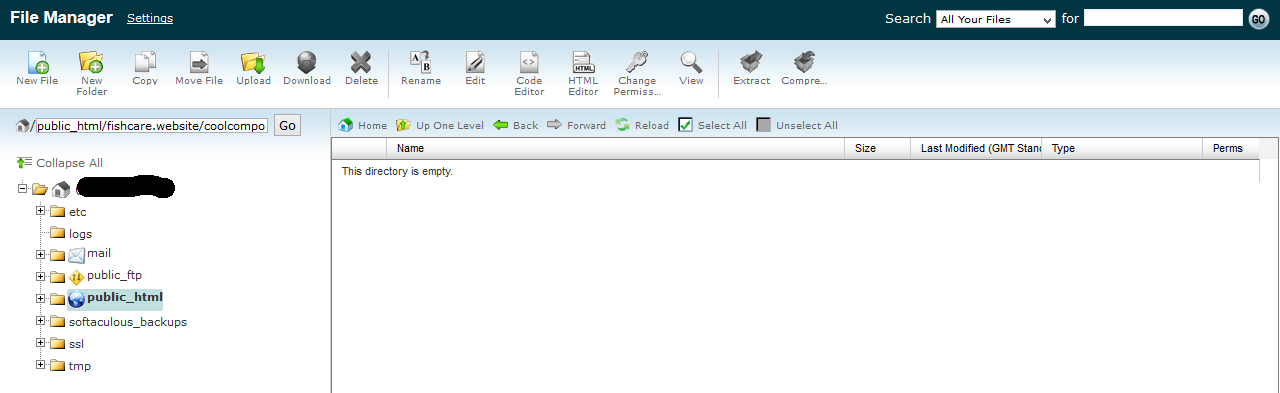
Once you have done that, you will see your new folder in the window, as seen below.
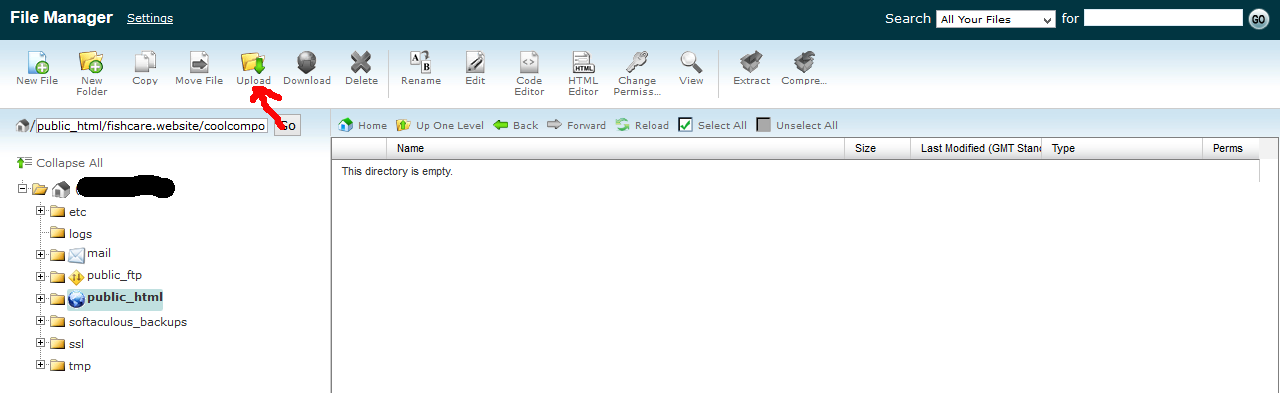

Click on the browse button as you can see above, this will bring up a file chooser box, navigate to the place you saved the composr quick installer. select the quick installer file and click on the open button, this will start to automatically upload the zipped file. Once that has finished, your screen should look something like this.
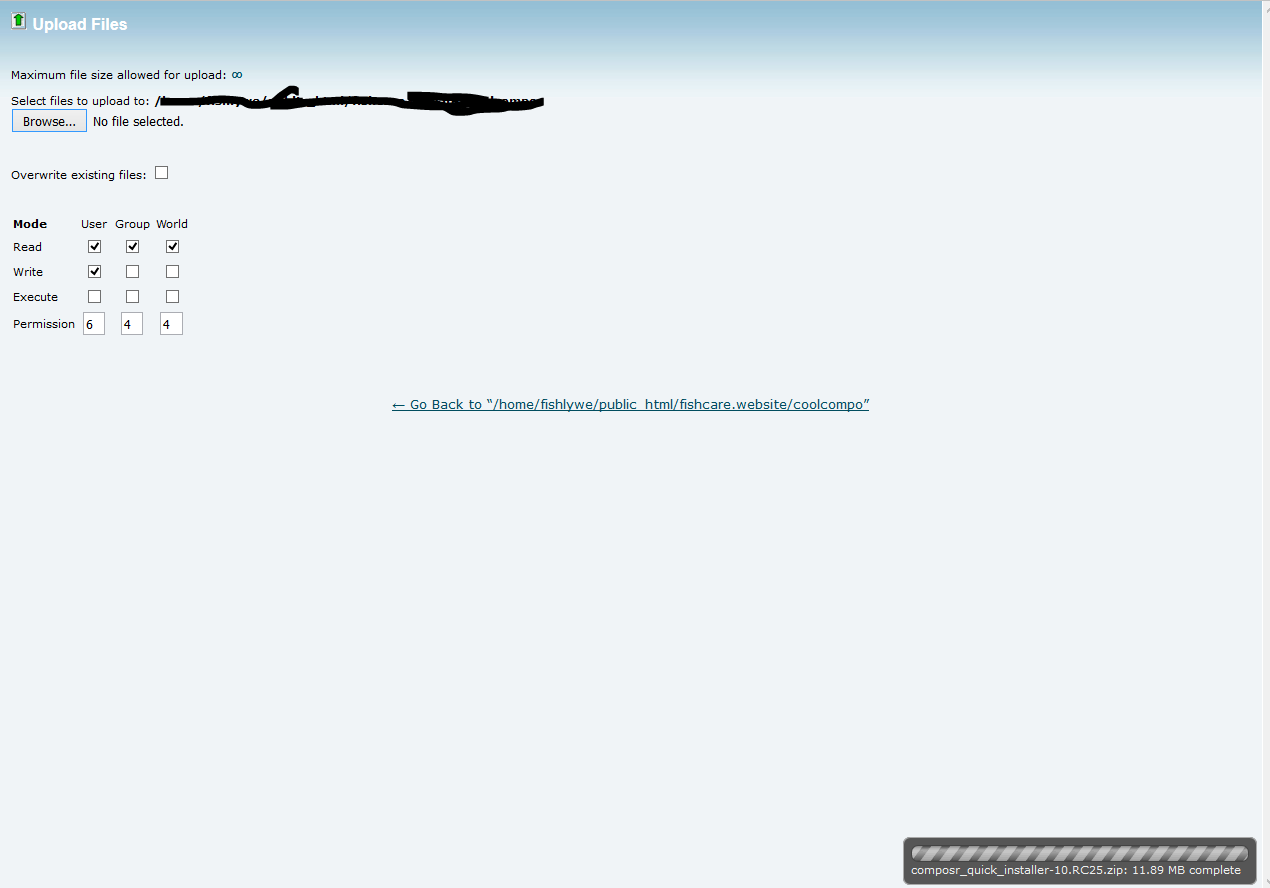
Go back to the file manager window, and you are likely to see…………..NOTHING!! As seen below

After clicking this, you should see the zipped file magically appear as in this screen shot below.


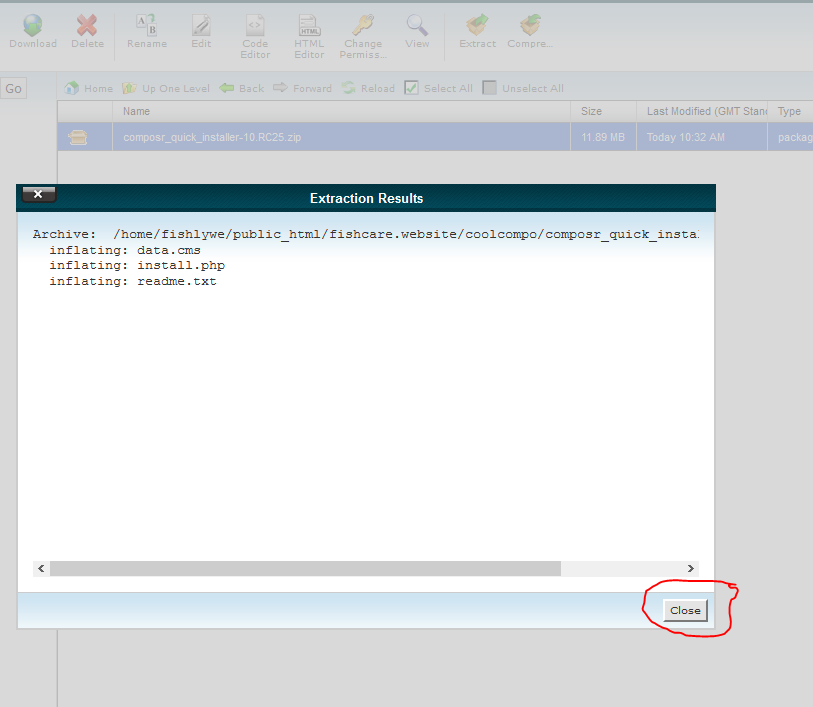

OPEN A NEW TAB in your browser, in the adress bar type the full address to the install.php file. So in my case, having followed all the instructions above the address would be
www.fishcare.website/coolcompo/install.php Please put YOUR ADDRESS IN and not mine!
Then press return or whatever your browser needs to goto the address you have put in.
The next post will show PART 3 and take you through the final install, all the hard work has been done and the rest is even easier!
Standard member
You should no be greeted withthe following screen.
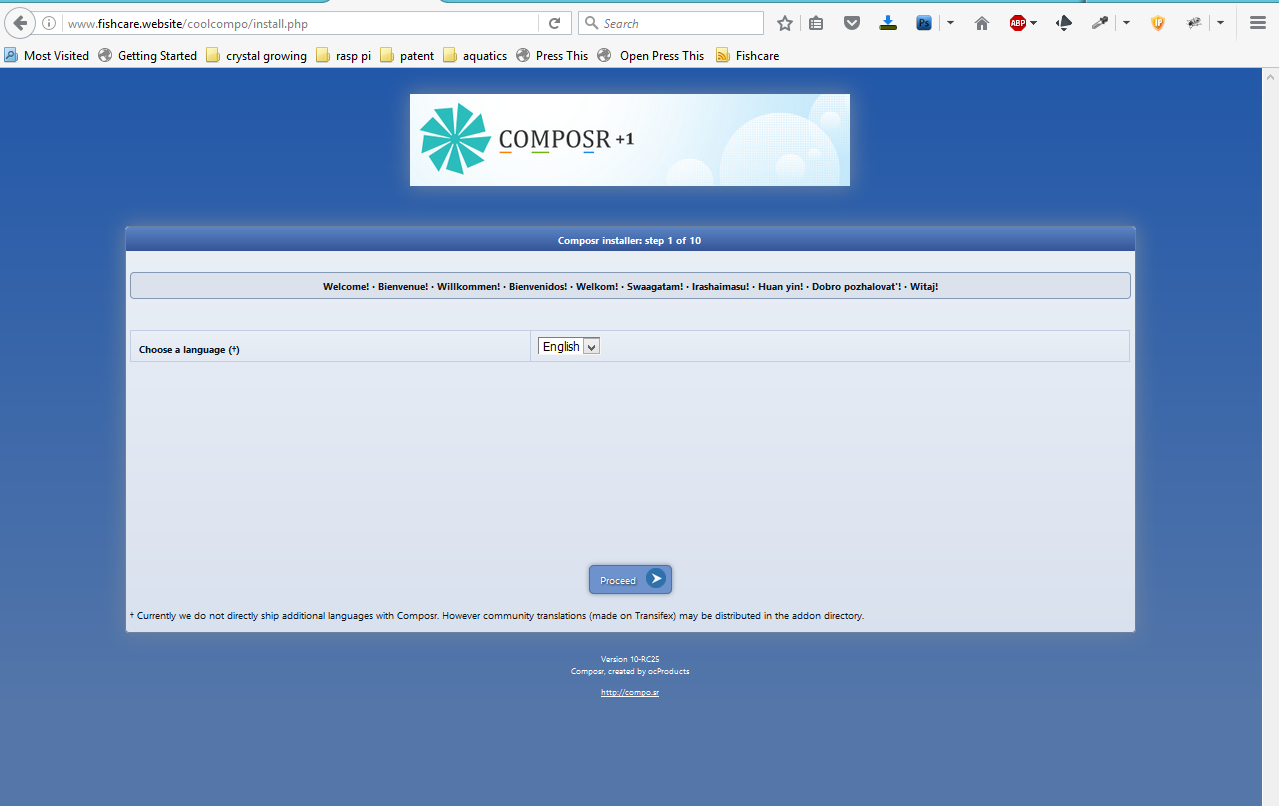
you will get this screen.

The next screen is where you choose the forum system you want to use. I may do another walk through at some point, that will show how to set up using a different forum. For now we will use the included forum, this is selected by default, you can also choose your database driver from this screen, as we have used MYSQL, again we leave the settings alone, so the screen looks like this.
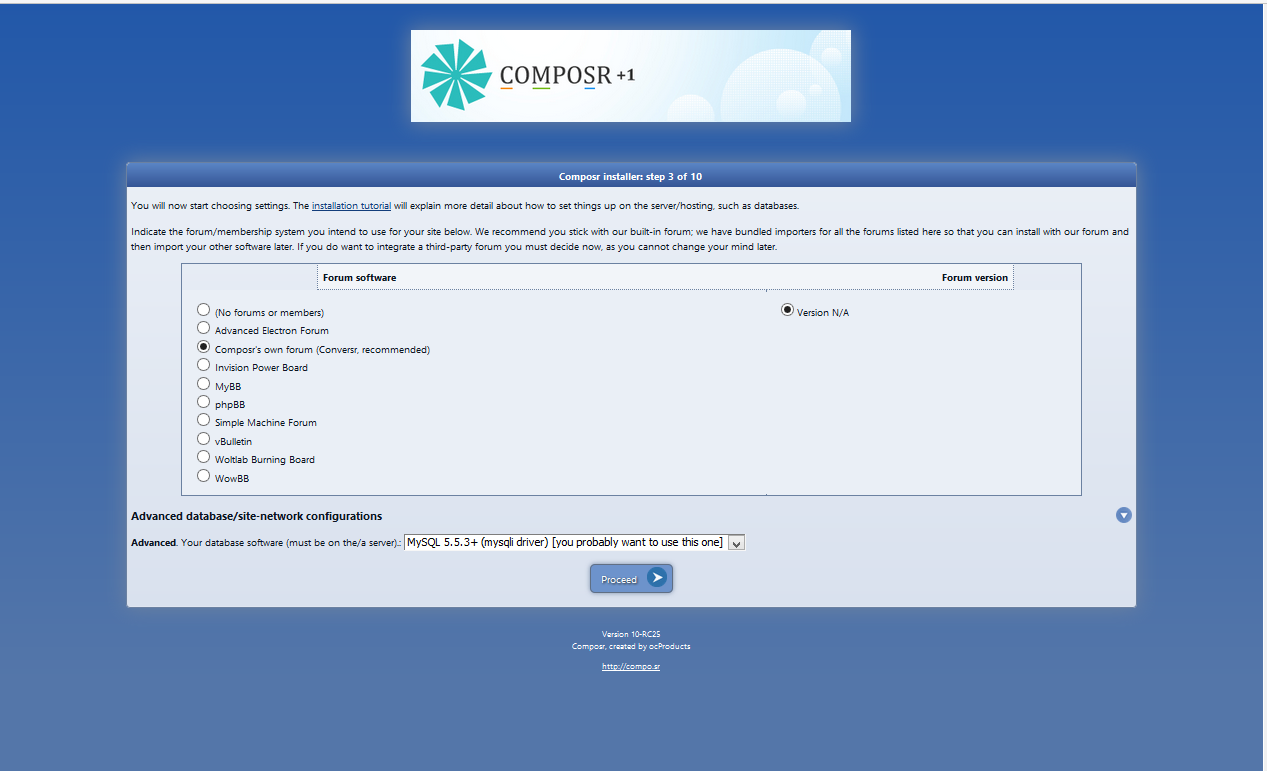
So once again we click on proceed.
As the next screen is large i will post the screen shots in sections, but these screen shots are of a SINGLE screen. The top part looks like this.

In my Case I am going to use HappyComp186=?
The next tick box is, SEND ERROR MESSAGES TO DEVELOPERS. I suggest you leave it ticked. My reasoning is, it may help the developers improve the software and fix any bugs quicker. Seeing as we didnt pay for the software, its the least we can do for them. But the choice is yours.
So here is mine now filled out.

The next part of the page looks like this.

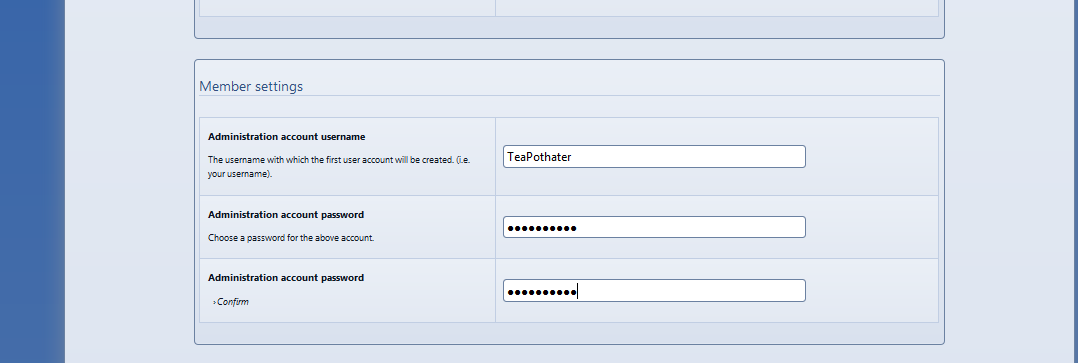
Change the name from admin, dont use your normal username or something stupid like administrator! these are always easy to guess by hackers. Be creative and make it dificult to guess, in my case i will use TeaPothater for the username and a strong password, one technique for passwords is to pick a phrase, and use the letters from it. To make it harder you also make every other letter uppercase.
So in my case the phrase is…… i hate installing software and my ex using the above technique the password (with some special characters and numbers added becomes) IhIsAmE1?=
So my screen now looks like this.
Pay ATTENTION to the next step, this is where we enter the details for the dataer base we set up in part1. So make sure you have the details handy.
Lets go through them one by one, i am going to use the settings i did in step 1 of the thread. So the screen looks like this before we alter it.
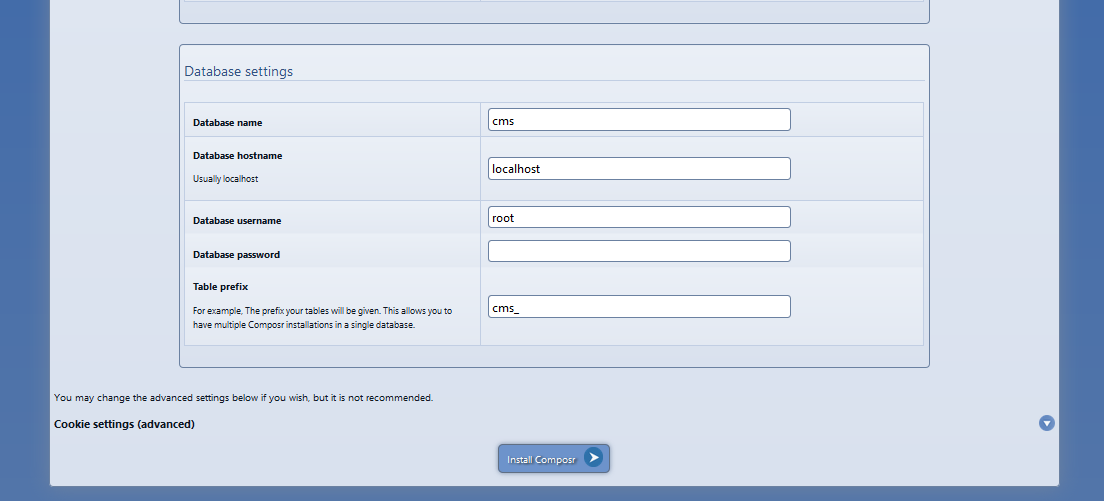
The next box is asking for the database host name, if you have followed this thread then in most cases you can simply leave it as it is (localhost).
The next box wants the database username that you set up back in part 1, it comes with root as default so just overwrite it with the name you set up. In my case in part 1 i used fishlywe_teapot
The next box needs the database password you set up in part 1, in my case this was 1XCT67??
You can leave the default value of cms in the last box left.
So now the screen looks like this

Now we click on install composr at the bottom. and you get a pop up telling you what i have already told you before
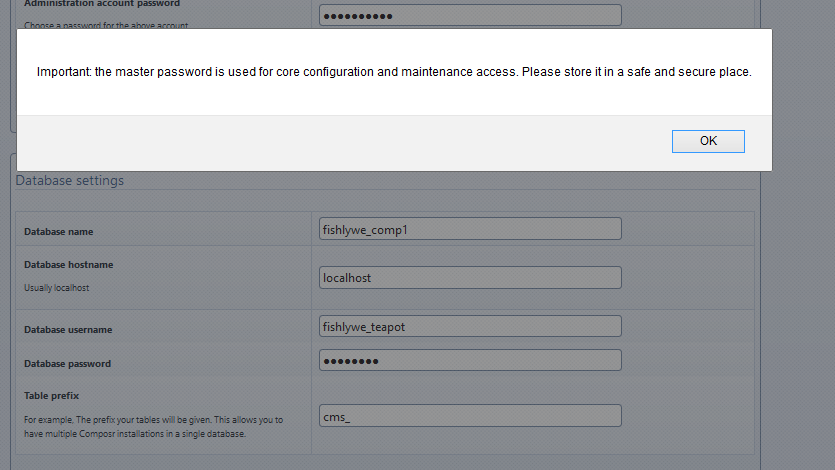
You dont have to do anything else at this pojnt, once you have clicked OK it will start to install, you dont need to keep clicking proceed, it will count down and do it automatically, go go pour a beer.
Finally you will eventually end up at this screen.

Now before you go and click on any of the links, go back to the cpanel file manager tab you left open. this one incase you have forgotten.
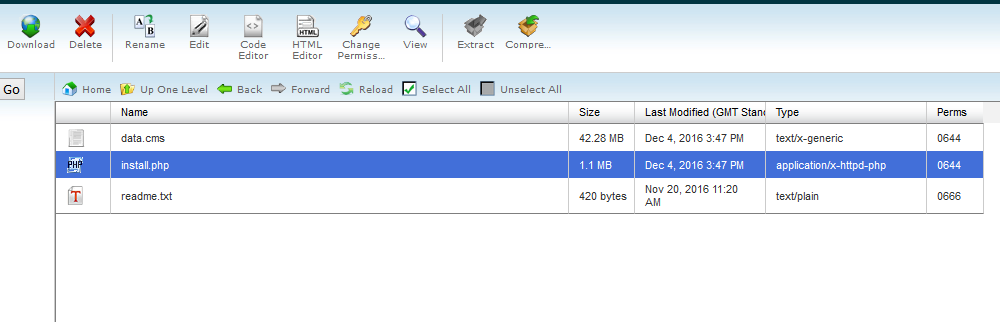
You can then go back to the install tab you have just come from, and click on the links i have highlighted here..
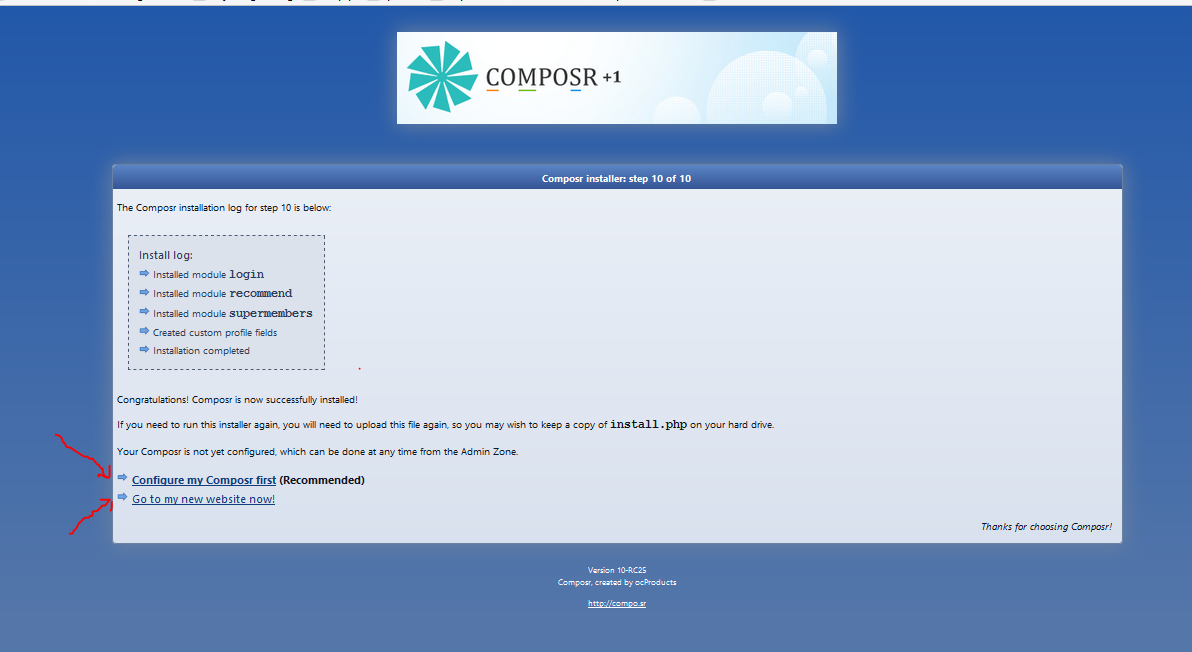
And that is IT, CONGRATS you have now installed composr!! It really is that simple!

Site director
kmw (Guest) said
great! I look forward to the next steps. would it be the same thing for postgresql?
From “Post #1,293”, 11th December 2016, 5:06 am
Pretty much yeah. I wouldn't recommend using postgresql though as we don't optimise for it and regularly test. So only use if you really can't use MySQL.
Become a fan of Composr on Facebook or add me as a friend. Add me on on Mastodon. Follow me on Minds (where I am most active). Support me on Patreon
- If not, please let us know how we can do better (please try and propose any bigger ideas in such a way that they are fundable and scalable).
- If so, please let others know about Composr whenever you see the opportunity or support me on Patreon.
- If my reply is too Vulcan or expressed too much in business-strategy terms, and not particularly personal, I apologise. As a company & project maintainer, time is very limited to me, so usually when I write a reply I try and make it generic advice to all readers. I'm also naturally a joined-up thinker, so I always express my thoughts in combined business and technical terms. I recognise not everyone likes that, don't let my Vulcan-thinking stop you enjoying Composr on fun personal projects.
- If my response can inspire a community tutorial, that's a great way of giving back to the project as a user.
Standard member
If it needs some tweaks let me know, i did it because i see on other sites people moaning Composr isnt on many one click installs. TBH its better installed by hand! And if I can do it………..
So hopefully the screen shots will show just how simple it all is.
Site director
 .
.
Become a fan of Composr on Facebook or add me as a friend. Add me on on Mastodon. Follow me on Minds (where I am most active). Support me on Patreon
- If not, please let us know how we can do better (please try and propose any bigger ideas in such a way that they are fundable and scalable).
- If so, please let others know about Composr whenever you see the opportunity or support me on Patreon.
- If my reply is too Vulcan or expressed too much in business-strategy terms, and not particularly personal, I apologise. As a company & project maintainer, time is very limited to me, so usually when I write a reply I try and make it generic advice to all readers. I'm also naturally a joined-up thinker, so I always express my thoughts in combined business and technical terms. I recognise not everyone likes that, don't let my Vulcan-thinking stop you enjoying Composr on fun personal projects.
- If my response can inspire a community tutorial, that's a great way of giving back to the project as a user.
Standard member
.Plus it helps me cement what i have learnt.
Guest user
Critical error – bailing out
This is an error that has been elevated to critical error status because it occurred during the primary error mechanism reporting system itself (possibly due to it occurring within the standard output framework). It may be masking a secondary error that occurred before this, but was never output - if so, it is likely strongly related to this one, thus fixing this will fix the other.
Allowed memory size of 134217728 bytes exhausted (tried to allocate 786432 bytes) [sources/tempcode.php(2110) : runtime-created function at 658]…
Site director
Guest said
Everything went smoothly until it returned an error from step 10 of the setup wizard. it still let's me login and do things but it does not complete the setup wizard which appears is the block across the top of the home page. I looked through some of the sources/tempcode.hph but i did not know where or what to look for…
Critical error – bailing out
This is an error that has been elevated to critical error status because it occurred during the primary error mechanism reporting system itself (possibly due to it occurring within the standard output framework). It may be masking a secondary error that occurred before this, but was never output - if so, it is likely strongly related to this one, thus fixing this will fix the other.
Allowed memory size of 134217728 bytes exhausted (tried to allocate 786432 bytes) [sources/tempcode.php(2110) : runtime-created function at 658]…
From “Post #1,307”, 12th December 2016, 12:06 am
Sorry about that, there was a bug in the latest RC relating to cache emptying that happened on some sites. It's fixed for the next RC and we've added an automated test for the Setup Wizard to reduce the chance of it happening again.
Become a fan of Composr on Facebook or add me as a friend. Add me on on Mastodon. Follow me on Minds (where I am most active). Support me on Patreon
- If not, please let us know how we can do better (please try and propose any bigger ideas in such a way that they are fundable and scalable).
- If so, please let others know about Composr whenever you see the opportunity or support me on Patreon.
- If my reply is too Vulcan or expressed too much in business-strategy terms, and not particularly personal, I apologise. As a company & project maintainer, time is very limited to me, so usually when I write a reply I try and make it generic advice to all readers. I'm also naturally a joined-up thinker, so I always express my thoughts in combined business and technical terms. I recognise not everyone likes that, don't let my Vulcan-thinking stop you enjoying Composr on fun personal projects.
- If my response can inspire a community tutorial, that's a great way of giving back to the project as a user.
1 guest and 0 members have just viewed this.